BioStar 2 - How to issue a smart card
1) Go to Setting → Card Format → Add Smart Card.

2) Enter the name of the smart card format. There are 3 types of cards supported for the AoC card and the SC card, Mifare, iClass, and DESFire. Select the card that will be used for the smart card.

3) You can select to use up to 2 site keys for the card. To use the Secondary Key, you will have to activate it first. Check the checkbox if you need to use the key.

4) You can configure how many templates you want to store inside the card and which block to start on storing the information. You can also configure the template size, if you don’t have enough space on the card to fit the template.

Applying the configured smart card format to the devices
To make the device read the smart cards, you will have to set the device to have the smart card format.
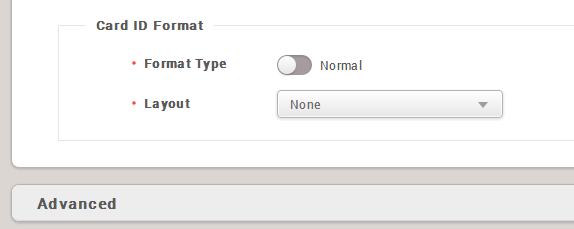
1) Go to Device → Select the device → Authentication Tab → Card ID Format.
2) You will find the smart card format layout menu. Select the layout that you want to apply.
Formatting a card
The card needs to be formatted before being used as a smart card. The card information stored in the blocks will be deleted.
1) Go to User → Select a user → + Card.
2) Select Read Card from the Card Type menu.
3) Select the device to format the card.
4) Click Format Card and place the card on the device. If the format is successful done, you will hear a sound from the device.

Issuing a smart card
1) From the same screen, please change the Card Type to Enroll Smart Card.
2) Select the device to enroll the smart card.
3) Select the smart card type. Access on Card and Secure Credential Card is supported.
3-1) The Access on Card will use the user ID same for the secure ID.
3-2) The Secure Credential Card’s secure ID can be modified.
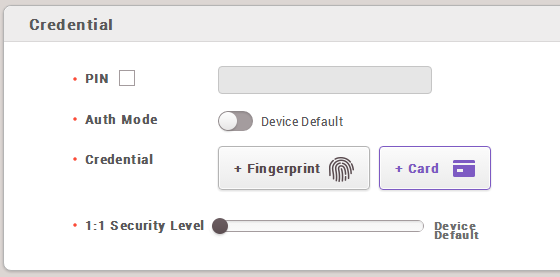
4) Select the fingerprint template to be written on the card. For example, click the 1st button to select the 1st template to be written on the card. The template will get highlighted. A fingerprint must be added first to use the template.
5) Click the Write Smart Card button.


Related Articles
BioStar 2 - How to delete blacklisted CSN cards
What is a Blacklist? A list of cards that are denied for authentication on the BioStar device. When a card is lost or stolen, misuse can be prevented by registering the ID of the card in the blacklist. Why would you want to delete a blacklisted CSN ...BioStar 1 - Hoe configureer ik een Mifare Site key
Mifare & iCLASS smart card hebben cryptografische sleutels nodig om de data stroom tussen de kaarten en scanner te encrypten. U kunt de site key instellen via de BioStar Client software. Enkel en alleen waneer de sleutel die in de scanner staat ...BioStar 2 - Mobile card is not working
When you press and hold the card but the scanner does not respond, you can perform the following steps. Android: 1. Go to settings - Biometrics and security 2. Under Privacy click on App permissions 3. Click on location permissions 4: Make sure that ...BioStar 2 - How to add users, cards and fingers
Although there are various ways of adding new users to your system, the below three methods are most frequently used. First is to add new users to the BioStar 2 server directly and transfer the data to the devices. Second is to add new users through ...Biostar - how to migrate Biostar 1 to Biostar 2
BioStar 1 Data Migration BioStar 1.x to BioStar 2.x Migration Tool allows you to migrate user data and event logs from BioStar 1.x into BioStar 2. • BioStar 1.x to BioStar 2.x Migration Tool is available on PCs with BioStar 1 and BioStar 2 installed. ...