BioStar 2 - How to use the Leave Management function
If you want to authorize Leave to an employee/employer, you can utilize Leave Management tool.
A Leave can be a various types of absence such as personal leave (vacation or time-off), family incidents (death or accidents), maternity leave (fraternity leave), Work off-site or business trips, or military service or jury duty(citizenship duties). Some of these can be taken into account as a part of worktime(paid time-off), or not considered as part of worktime(non-paid time-off).
Scenario in this example: an employer (Administrator) needs to go for his military service duty on Nov 1st, 2018.
- The purpose of using Leave Management is to identify if an employee/employer is entitled to have paid time-off or non-paid time-off.
- Worked: paid time-off(counted as a part of worktime
- Non-worked: non-paid time-off(not considered as part of worktime)
* Because the military service duty is not taken off of the employer's entitled leave for the year, it will be considered as “Worked” leave in this example.
1) Connect to BioStar 2 Client and then go to Time Attendance tab, and click on “Add Time Code” button

2) Check on “Leave Management” tab of Type, set the name and description, and then create it by clicking Apply
- as mentioned, military service will be considered paid time-off, thus this Leave Management will be created as “worked.”
3) Create shift as you require, hit Apply & Next
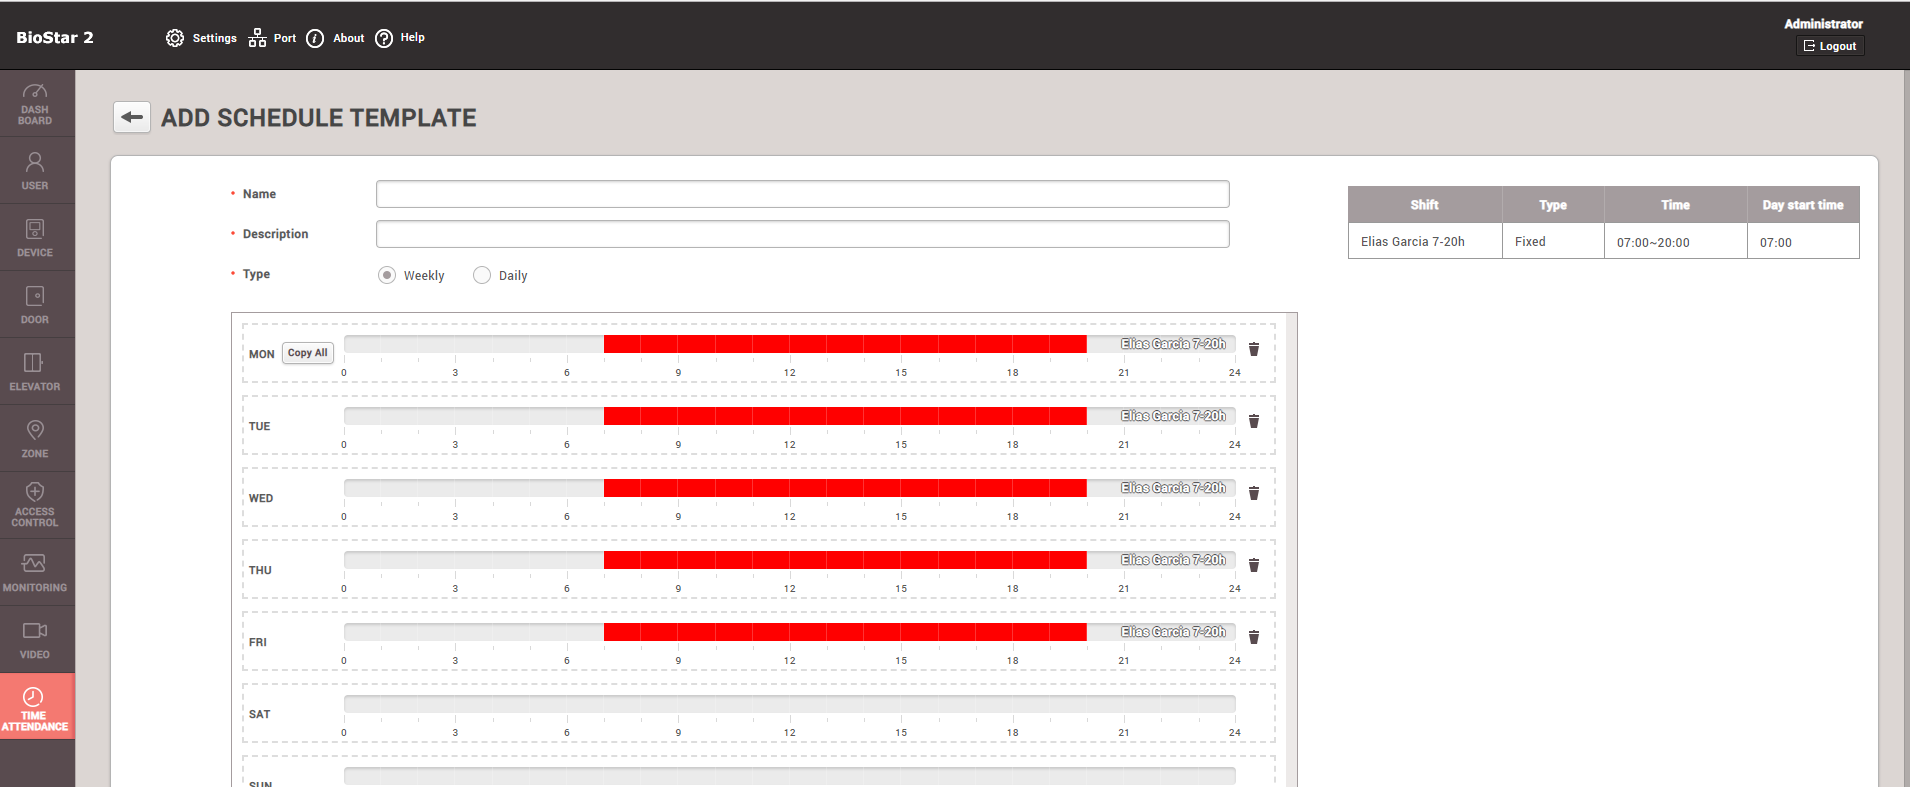
4) Create schedule template as you require
5) Add schedule as you wish
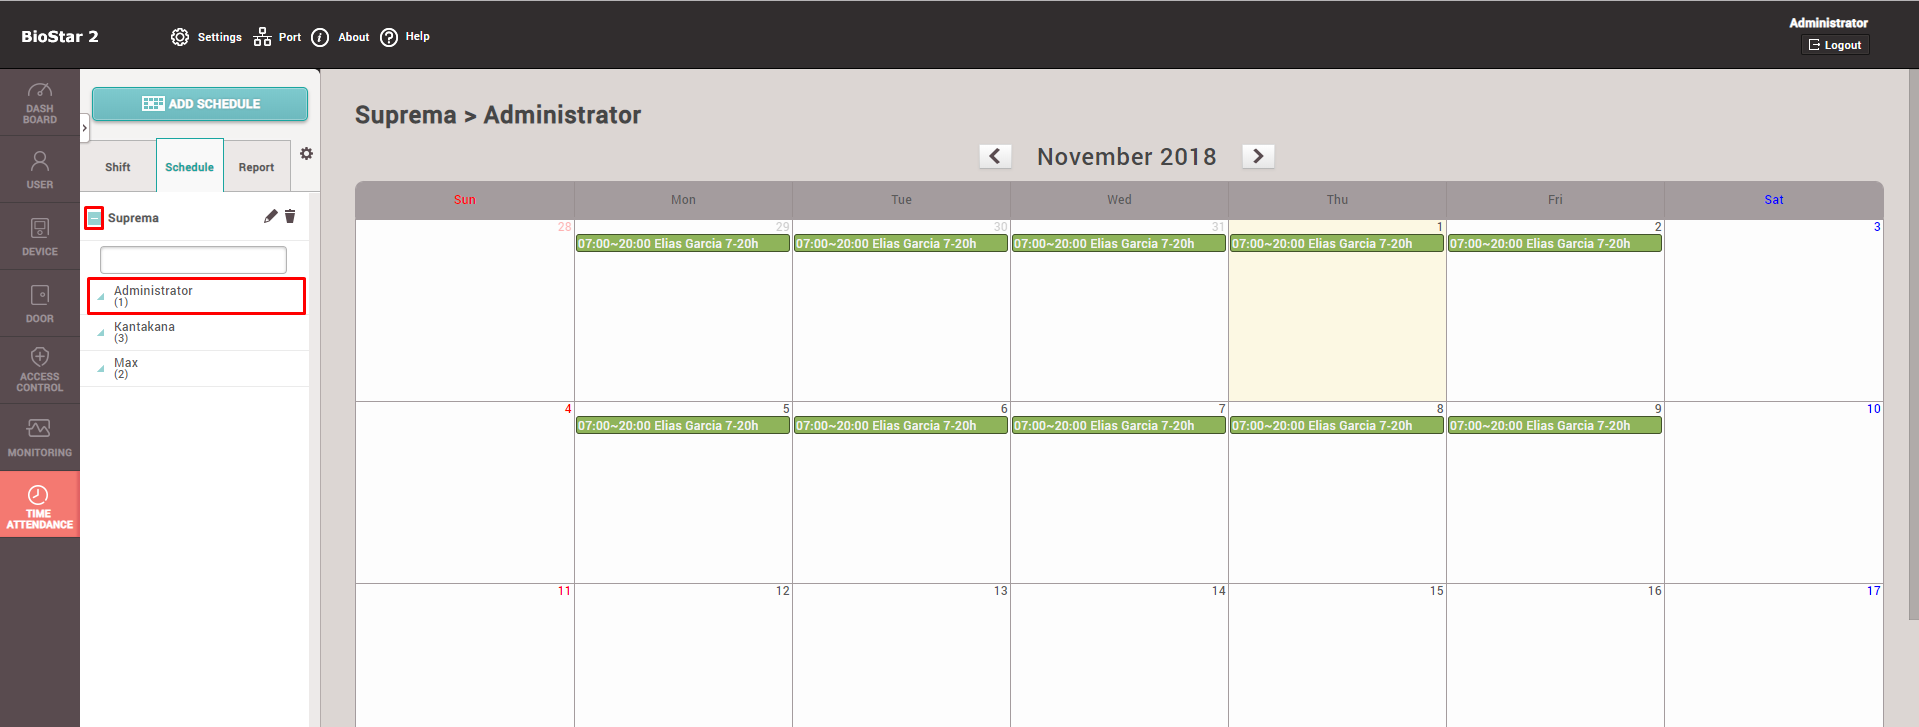
6) Now when the schedule is created, you will be able to see it on the left-hand column. Expand it and click on a user to see his or her individual schedule in calendar format.
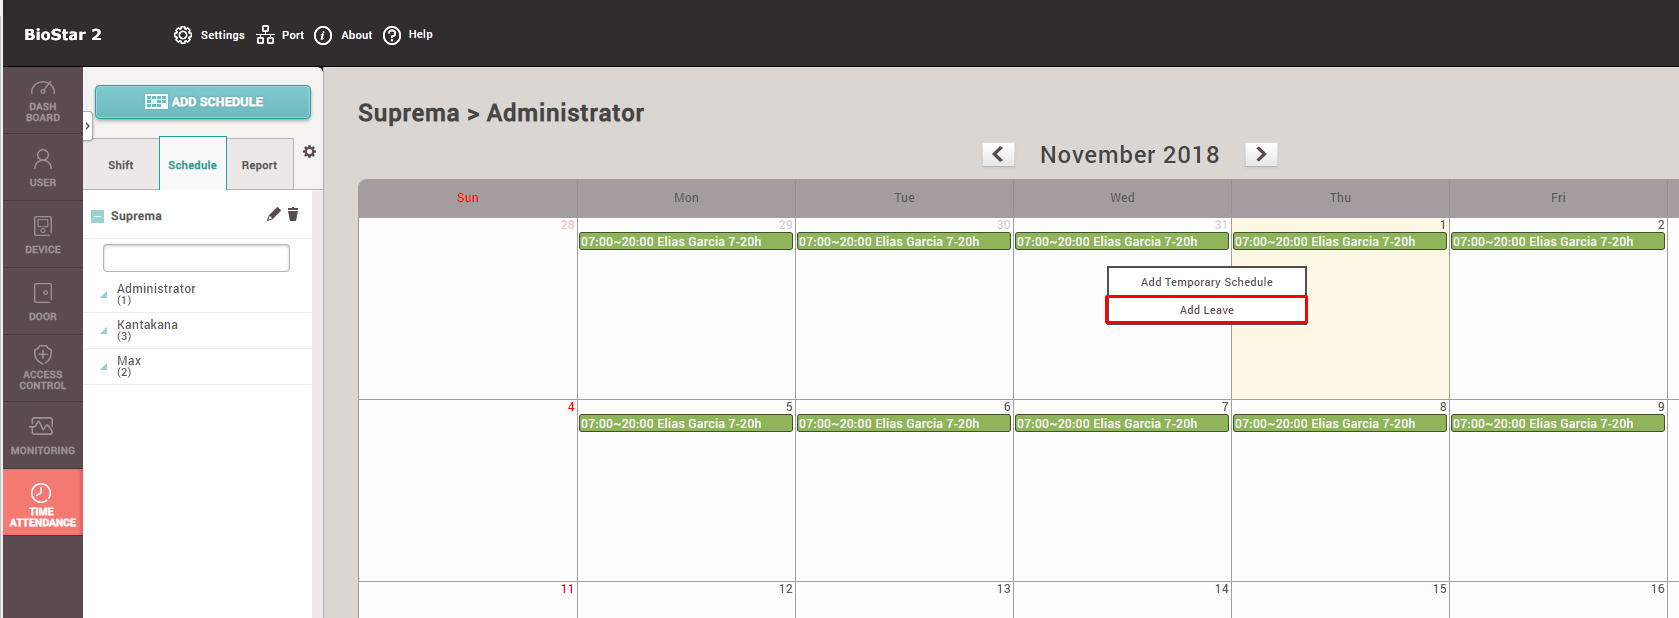
7) Click on anywhere on the calendar to authorize Leave for this employer, you can see that a menu is created to offer you options of “Add Temporary Schedule” or “Add Leave.” Click on “Add Leave.”
8) You will see an “Edit Leave” popup window, you can now set Leave for this employer. Select the appropriate time code for Leave menu bar. If you would like to authorize only specific part of a day for absence check on “Use Time” box then you can allow this employee to only leave for certain part of a day. You can also set Start Date and End Date of this leave, and can select other users in “Apply to Other Users” if you would like to apply this leave to multiple users. Lastly, the comment box offers an option to leave a memo for the Leave.
For the case of assigning specific part of the day for the Leave, check on Use Time checkbox. Normally from the set Day Start Time till the set End of the Day would be used.
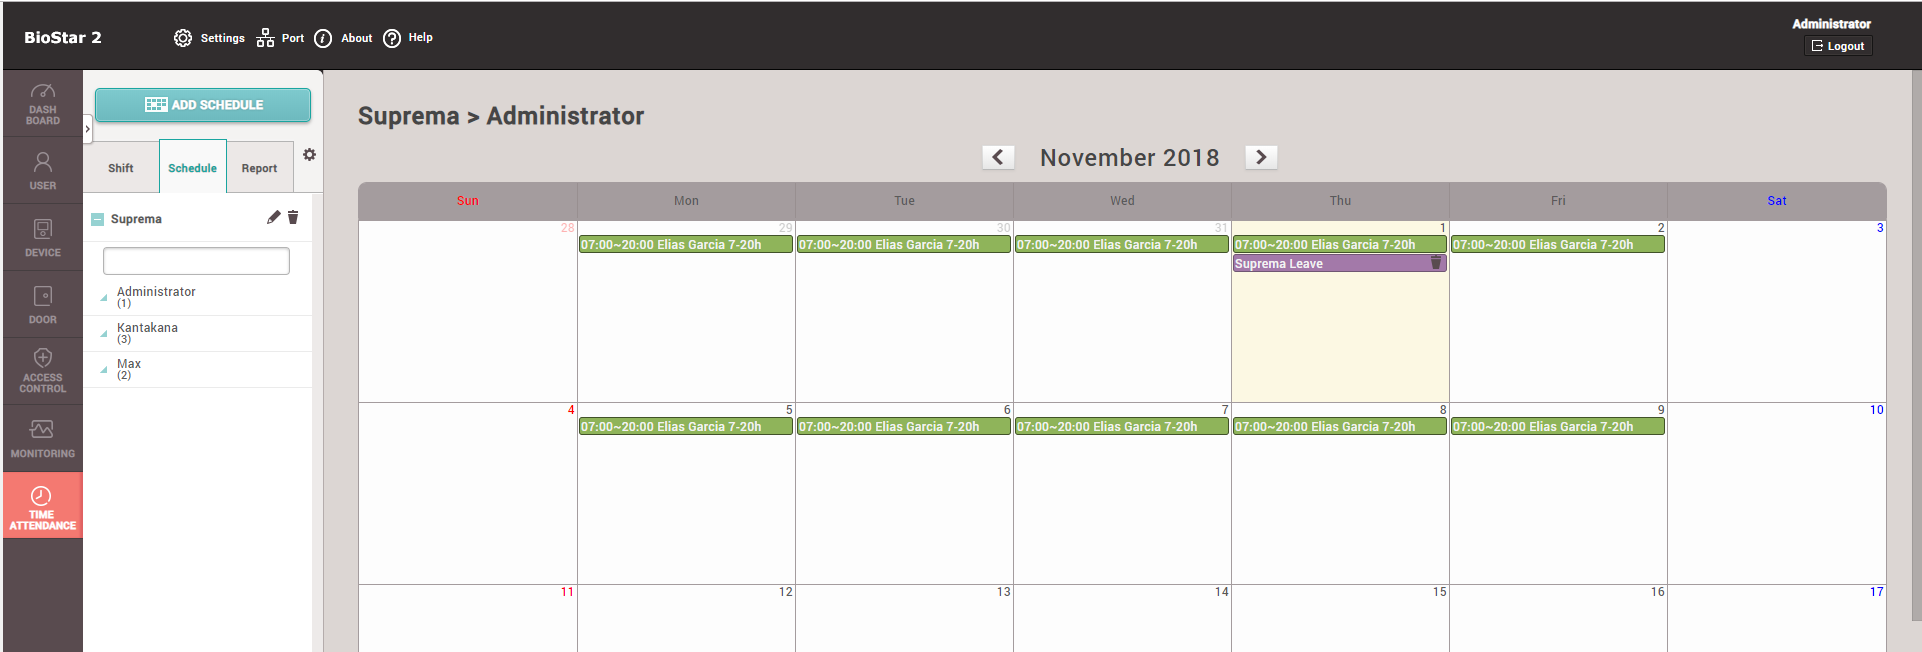
9) Now when you click OK, you can see that this leave is now authorized for this user on his or her calendar.
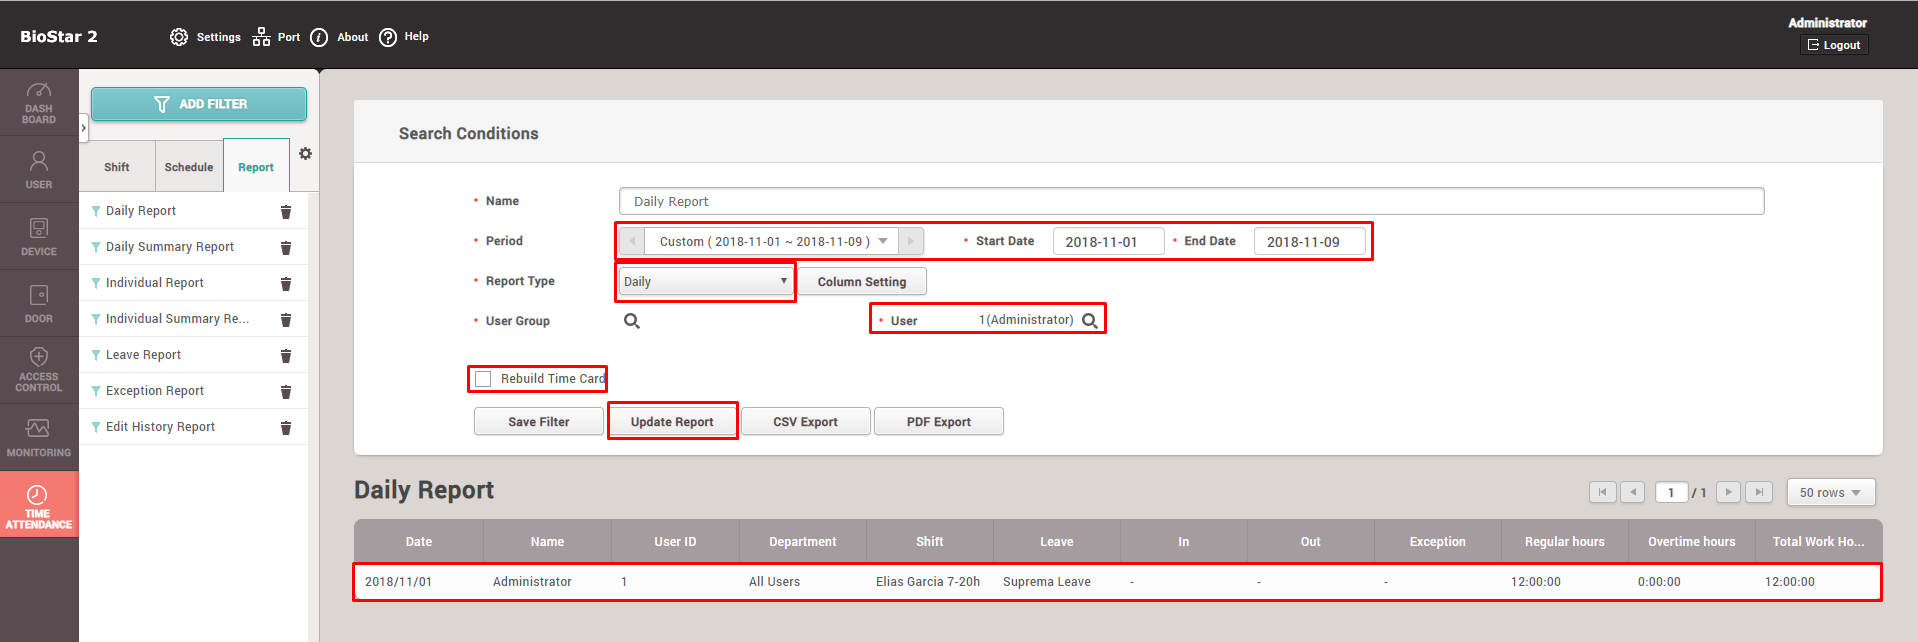
10) Go to Report section, set the desired information on period, report type, column setting, user, and press “Update Report” after check on Rebuild Time Card. You will see that the Leave that you assigned for the user is now shown on the report.
Related Articles
BioStar 2 - Time and Attendance (T&A) - Introduction
What is a Time and Attendance System? Time and Attendance (T&A) System is a process that tracks and manages employees’ check-in and check-out time, meal time, vacations, and absences. Traditional time and attendance system was based on manual ...BioStar 2 - Time and Attendance (T&A) - How to create T&A with flexible shift
Scenario: - Employee can choose a regular shift at anytime between 8:30am to 18:30pm(8 working hourse) as below 9:00am to 18:00pm 8:30am to 16:30pm 10:30am to 18:30pm - The system needs to see if someone has worked 7 hours a day - The system needs ...BioStar 1 - Time and Attendance - Setting up Time Registration, Shifts & Schedules
The BioStar 1.x software has a lot of time registration possibilities within the software and there are many different ways to set up the shifts and daily schedules. In this article you can find more information about the 'Time and Attendance' ...EasySecure.cloud - EasyAir - How to use time registration on the X-Station 2
This article shows how to use the time registration functionality with our EasyAir product line. It is important to always select a T&A code before placing your mobile phone or access card. You can also open a video by clicking the following link. If ...EasySecure.cloud - How to set up a online registration page
Within our EasySecure Cloud solution we have the option to use a ‘online registration page’. This is a digital time registration page where you can use your code, card or finger to register your worktimes and break times. This virtual time ...


