EasySecure.cloud - iLOQ
Overview
This article summarizes all relevant information needed to setup and use the iLOQ integration. With this integration you will be able to activate/de-activate pre-programmed iLOQ S5 Keys, Key Fobs and Mobile Keys for S50 locks in EasySecure.
Features available in this version:
· Syncing of users
· Link/unlink pre-added physical keys and pre-added iLOQ access rights to users
· Send Mobile Keys
· Send Mobile Keys
· Collect Audit trails
Features not yet available in this version
·
Time
profiles
· Block List
· Multiple Zones / Locations
· Multiple Zones / Locations
Currently iLOQ manager software is still needed for configuration, setup and advanced functionality. In this case EasySecure functions as a client layer to have easy end-user experience for basic user, key control and log collection. The iLOQ names and descripitions from locks, keys, access rights, zones, etc can be viewed but are not editable from EasySecure. Changes in this matter need to be adjusted in iLOQ manager.
Obligatory iLOQ
devices and licenses
· iLOQ
5 Series locking system
· 5 Series lock licenses
· Online licenses
· iLOQ Online devices or mobile phone for key programming
· Key programming process requires that the system
has at least one iLOQ Online reader
· iLOQ S5 or s50 cylinders and keys
· Programming Token(s) and USB Desktop programmer
· Programming Token(s) and USB Desktop programmer
· Keys and locks used by the integration need to be
pre-programmed to the iLOQ system.
Information needed to
complete the integration deployment:
· Service address
– can be found in the iLOQ Manager login window or initial license
contract email
· Service code – can be found in the iLOQ Manager login window or initial license
contract email
· User
ID and password for the integration agent
· Create a new User ID for the integration agent
· Administration -> Add User -> Add User ID
-> Add new person with user ID
· No expiration or password forced password
changes
· Add all user rights to the integration agent
user
iLOQ locking system
requirements
API License
An iLOQ API license is mandatory. Please ask the iLOQ partner who is responsible
for the locking system to make sure that the API license has been activated. If the license has not yet been activated, the
iLOQ Partner who is named in the locking system contract can contact iLOQ
customer service in order to activate the missing license.
API access rights
API access rights are mandatory for the
integration to be able to assign access rights and order programming
tasks. In other words, the integration can only use API access rights.
Open iLOQ 5 Series Manager and go to Administration
-> Edit locking system information to check if the API
access rights in use option is ON. If the API access rights in use option is
OFF, set it to ON to enable usage of API access rights.
NOTE! If API access rights were not activated
when the locking system was first created, you will most probably need to
create at least some of the access rights again and re-program the locks.
Locks needs to be assigned to allow API access rights
Sometimes this option is not presented during initial adding of the locks. Therefore a setting can be found via edit access rights to allow this:
1. In iLOQ Manager --> Browse locks, select lock, right click, edit access rights, edit lock settings and access rights, check the box "allow API access rights", finalize the wizard without making any further changes.
2. Order the programming task.
3. You are now able to use API access rights on this lock.
Key handover without returning
Key handover without returning is mandatory for
the integration to be able to assign keys to persons without using iLOQ 5
Series Manager.
Open
iLOQ 5 Series Manager and go to Administration -> Edit
locking system information and make sure that the setting "Handed
over key can be attached to another person without returning the key" is ON.
Specific notes for implementation:
- Linking a Programming Token in iLOQ Manager to a user(administrator) during the first wizard setup should NOT be done for API users. It can eventually (and must be) done after the User is added. You can recognize this by logging in iLOQ manager. If you can login, without the need for the token, the API user will function correctly. If this is not the case, a new user must be created and thereby skipping the token coupling. If the API user is not linked in the correct way, it will block the API calls.
- Deleting users from EasySecure that can not be deleted from ILOQ (like admin users or specific links in iLOQ manager) will be re-synced to EasySecure. This is because of a limitation in the API. In case of user deletion from iLOQ manager, users will not be deleted from EasySecure and should be done manually. If users are deleted from EasySecure, users that CAN be deleted from iLOQ will be deleted automatically.
- Changing the User name after logs have already been added:
iLOQ can currently only send the user's First Name and Last name in plain text via the API. Also the logs in EasySecure can not be updated once imported due to system limitations. Therefore the user name will not change in the imported logs, after changes are made to the username.
Physical key: Programming
S5 Keys and KeyFobs can be updated by presenting them to an Online Wallreader or via the new S50 Mobile App or Fob App. The programming token can also be used, however this requires for the end-user to have a PC nearby and to be connected to iLOQ Manager.
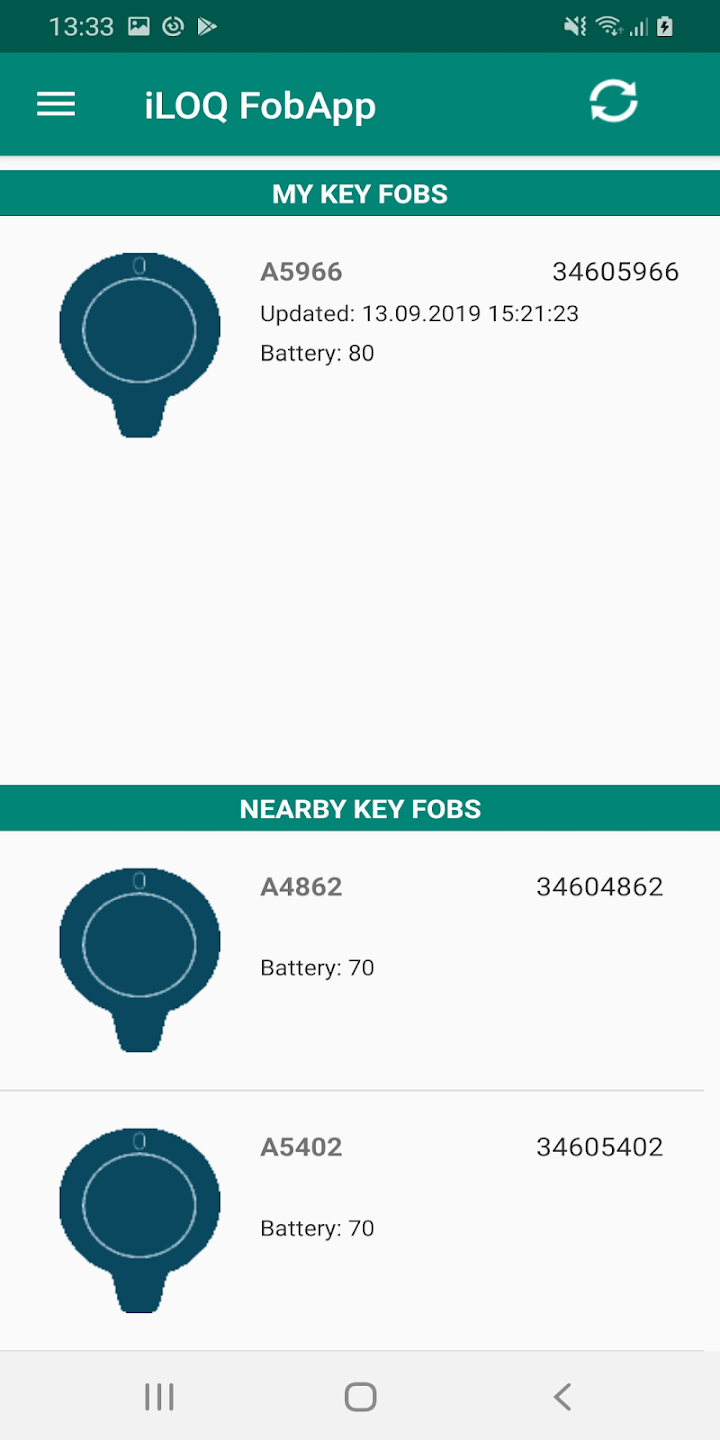

Visit the iLOQ helpcenter to check out this article for instructions on how to update S5 keys via the app.
How to setup the integration?

Please make sure to check all necessary preparations mentioned in the chapter above before setting up the integration.
1. Log in to the EasySecure cloud portal.
2. Go to Settings --> Scanner & Services and fill in the details from the iLOQ environment that needs to be linked:
4. Create an info field for the Email address and make sure the function "email" is linked to this field. This function is used for Mobile Keys.
NOTE! If this is not setup before the first initial sync, it will generate an error in the API.
5. Do the first initial Sync, via Users --> Click on iLOQ Sync button. This will create a default Location and Zone " - " in EasySecure, connected to Doors, Scanners and all the mapped information needed for the integration. Device information will be added automatically so no further structures setup is needed.
Make sure the timezone in iLOQ matches the timezone in EasySecure. The timezone setting can be found in the created location via Structures Setup -> Locations.
6. After the first initial syncs are completed, you will notice existing users from iLOQ are now imported to the User list. Newly created users from EasySecure will be transferred to iLOQ automatically after saving.
The iLOQ sync button can now be used for general syncs to always keep the information between iLOQ and EasySecure up to date.
The iLOQ sync button can now be used for general syncs to always keep the information between iLOQ and EasySecure up to date.
How to link a S5 key or KeyFob + Access Rights in EasySecure?
1. Sync existing users from iLOQ or add a new user in EasySecure.
2. Edit the user details if needed and press Save.
3. In the user screen, go to the My Keys section and click on the button:
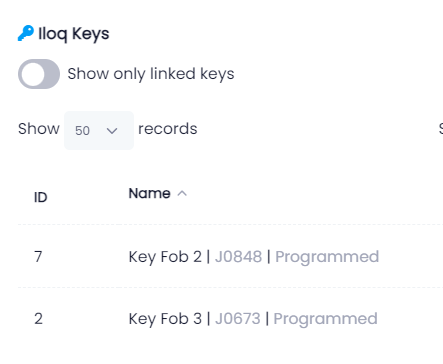
Choose iLOQ Key for S5 Keys or iLOQ Key Fob for Key Fobs
4. In the pop-up window, select the available key(s) by enabling the toggle and click "Next"
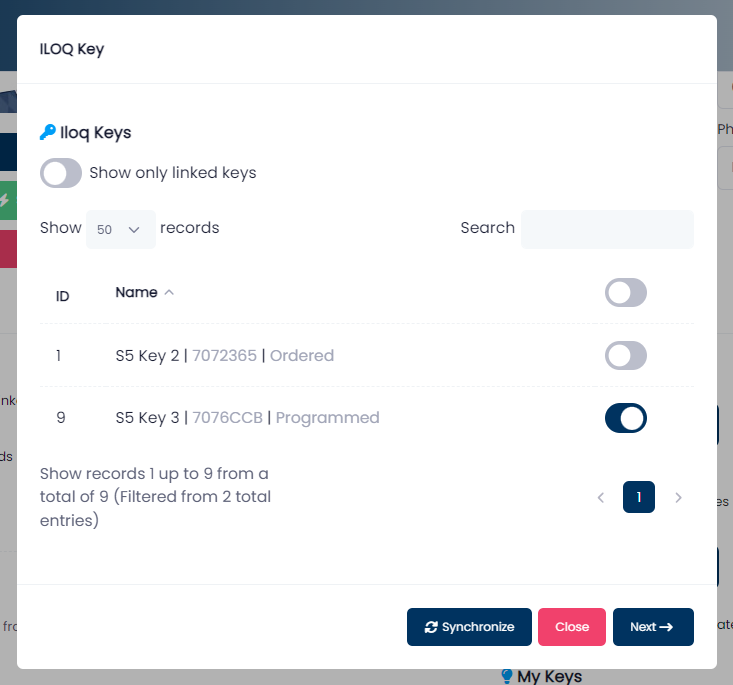
Multiple Key's from the same type can be added and activated in the same screen.
Multiple Key's from the same type can be added and activated in the same screen.
NOTE! When a key is not visible in the pop-up screen, it could mean this key is already attached to another user. The key will become visible again when detached from the already linked user.
5. In the next screen, select the correct Access Rights that you want to activate for the key(s):
6. Click "Save" to finalize. After the task is completed check the status of the key.
After changes are saved to iLOQ, a key will be in the 'Ordered' state. This means a key is ready to be programmed by a Wallreader, USB Programming Token or Mobile Phone app to activate the changes.
After the physical programming is done by the end user, the status of the Key can be refreshed by clicking on the in-screen "Sycnhronize" button.
After the physical programming is done by the end user, the status of the Key can be refreshed by clicking on the in-screen "Sycnhronize" button.
7. A Key is properly updated if the status is changed to "Programmed"
How to add a Mobile Key + Access Rights?
1. Sync existing users from iLOQ or add a new user in EasySecure.
2. Add the Email address and/or Mobile Phone number, edit the user details if needed and press Save. Go to the My Keys section and click on the Mobile Key button.
NOTE! The phonenumber should be in this format: +31612345678 (depending on the country prefix and mobile number structure)
3. In the pop-up window the key name is auto generated and can be changed if needed. Select the communication method (default is added with setting from Scanner and Services), check the Phone or Email and select the Access Rights.
4. Click save to send the invite to the user. When using Phone, the user will receive a text message with instructions. When using Email the user will receive a link, so make sure the email client is accessible on the mobile phone.
In both scenarios, the iLOQ S50 app needs to be installed from the App store before activation. The app will then be automatically started for activation when opening the link.
5. After the activation is done by the keyholder and the App has made a connection to the cloud, the "Sent" status will be changed to "Programmed"
To refresh the status of the key, after sending the invite click "Synchronize". If the status is not changed, the key has not been activated yet. If the invite is expired after not been activated by the phone owner, a new invite can always be sent from EasySecure by clicking on the Re-Send Key button.
How to unlink key(s) and delete Access Rights from a key?
1. Search for the User in EasySecure and open the User tab of the keyholder.
2. Open the pop-up window by clicking the iLOQ Mobile Key, iLOQ Key or iLOQ Key Fob icon in the My Keys section
3. Un-toggle the keys that you want to delete from the User and click Next.

4. The following notification will be shown:
2. Open the pop-up window by clicking the iLOQ Mobile Key, iLOQ Key or iLOQ Key Fob icon in the My Keys section
3. Un-toggle the keys that you want to delete from the User and click Next.
4. The following notification will be shown:
5. Click Save and OK to finalize.

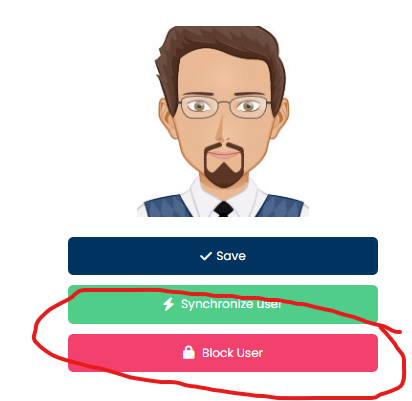
In the situation where the user is blocked all keys and access rights that are linked, will be automatically removed. Please be aware this will not directly revoke access rights from physical keys, since programming is still needed (until Block List functionality is added). For Mobile Keys, access rights will be revoked directly after the end-user opens the app on his mobile phone.
How to change the Access Rights of a key?
1. Search for the User in EasySecure and open the User tab of the keyholder.
2. Open the pop-up window by clicking the iLOQ Mobile Key, iLOQ Key or iLOQ Key Fob icon in the My Keys section.
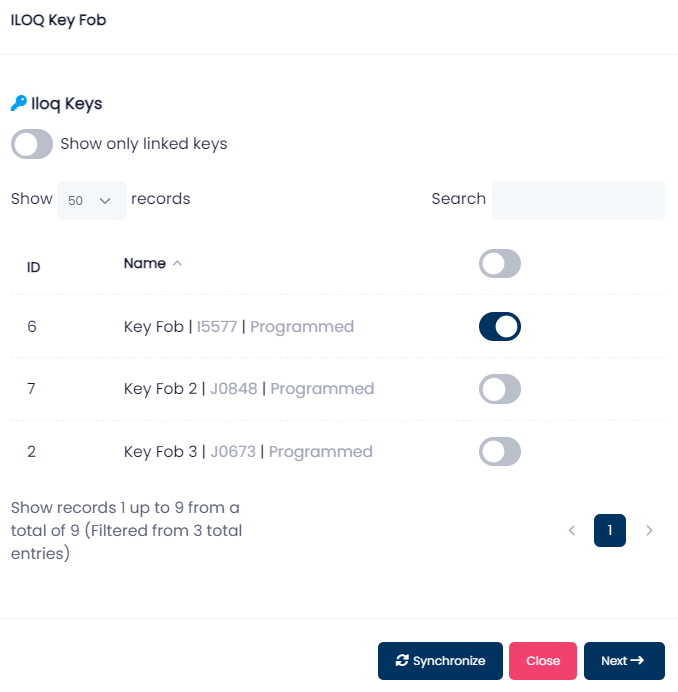
3. The already linked key(s) will be shown. Click "Next" to go to the Access Rights screen.
2. Open the pop-up window by clicking the iLOQ Mobile Key, iLOQ Key or iLOQ Key Fob icon in the My Keys section.
3. The already linked key(s) will be shown. Click "Next" to go to the Access Rights screen.
4. Toggle / Un-toggle the Access Rights that you want to change for the key(s). With multiple keys, all can be done at the same time by changing the sections per key.
5. Click Save and OK to finalize.
6. Check the status of the key for the "Ordered" state. Changes will be made after the physical programming has been done. A correctly updated key should be shown as "Programmed" after clicking the "Synchronize" button again to refresh the status.
6. Check the status of the key for the "Ordered" state. Changes will be made after the physical programming has been done. A correctly updated key should be shown as "Programmed" after clicking the "Synchronize" button again to refresh the status.
How to retrieve Logs?
1. Go to Reports in EasySecure and select the "Access log" view.
2. Click on iLOQ Logs Sync to refresh the Logs from iLOQ.
3. After the sync, click on View Access Log for detailed logs, or navigate to the Dashboard view for a summary overview.
3. After the sync, click on View Access Log for detailed logs, or navigate to the Dashboard view for a summary overview.
Related Articles
EasySecure.cloud - EasySecure App wachtwoord reset
Indien u niet kunt inloggen in de app wanneer u het wachtwoord bent vergeten gaat u als volgt te werk: 1. Open de EasySecure app op de telefoon. 2. Klik op Wachtwoord vergeten? 3. Vul het email adres in welke eerder is gebruikt om in te loggen in de ...EasySecure.cloud - Hoe kan ik inloggen?
Ga met uw browser naar de volgende webpagina en open uw EasySecure-omgeving: https://easysecure.cloud U kunt inloggen met een juiste combinatie van bedrijfsnaam, gebruikersnaam en wachtwoord. Let op! Deze gegevens zijn hoofdlettergevoelig. Wanneer u ...EasySecure.cloud - Hoe kan ik toestemming voor biometrie vastleggen in de software?
Bekijk onze privacy pagina voor de meest recente informatie over dit onderwerp Biometrie staat voor gemak en veiligheid. Geen verloren kaarten, vergeten codes en geen passen in omloop. Veel gemak voor werkgever én werknemer, maar bij ...EasySecure.cloud - Communicatie & Encryptie
EasySecure International heeft veiligheid uiteraard hoog in het vaandel staan. Wij kiezen dan ook voor de beste beveiliging en werken samen met de beste hosting partijen en de nieuwste technieken. EasySecure is ISO 27001 gecertificeerd. In de ...EasySecure.cloud - API
Introduction This article serves as a comprehensive guide to understanding, utilizing, and integrating our API into your applications. Whether you are a seasoned developer or new to API consumption, this documentation will provide you with all the ...