BioStar 2 - How to configure visitor management?
From BioStar v2.7.7, BioStar2 supports Visitor Management. (Link : BioStar v2.7.7 new Features)
(Required License - Visitor License of BioStar2)
Visitor Management of BioStar2 SW allows to register Visitor Information by an Operator or a Visitor.
CHECK-IN and CHECK-OUT of Visitor are only confirmed by the visitor menu of BioStar2 SW.
1. Overview of Visitor Menu
1.1 Visitor Registration
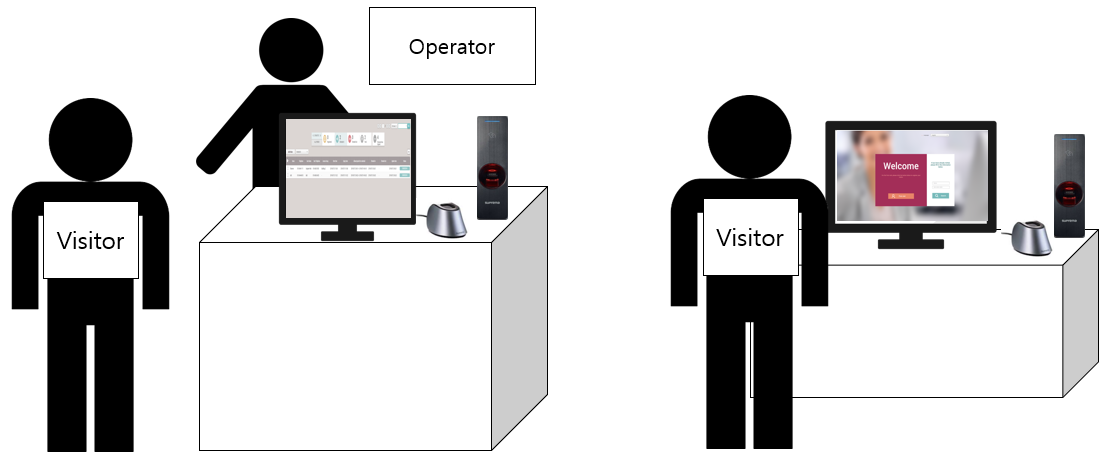
[Image 1. Left: Registration by Operator, Right: Self Registration by Visitor]
1.1.1 Registration by Operator at a front desk
A visitor should visit a reception desk and register the user information with an administrator or a custom level administrator of BioStar2 SW who can access Visitor Menu.
1.1.2 Self Registration by Visitor
A visitor can register the user information at self-registration location before visiting the reception desk.
1.2 CHECK-IN and CHECK-OUT (SW Method Only)
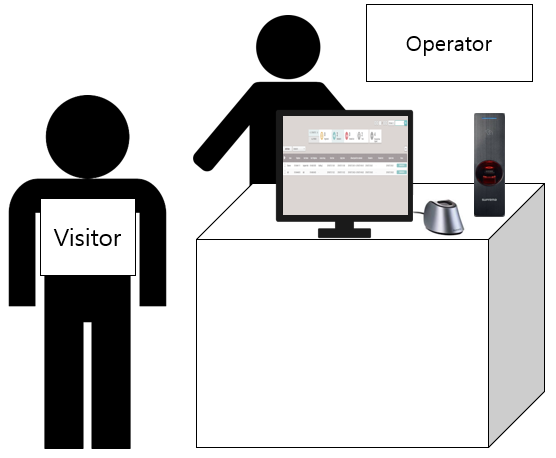
[Image 2. CHECK-IN / CHECK-OUT by operator]
1.2.1 CHECK-IN and CHECK-OUT of Visitor are only confirmed by Administrator, Visitor Operator, or a custom level administrator of BioStar2 SW who can access Visitor Menu.
1.2.2 Visitor User Authentication does NOT handle as CHECK-IN or CHECK-OUT.
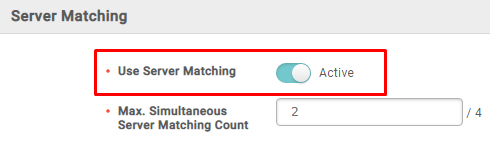
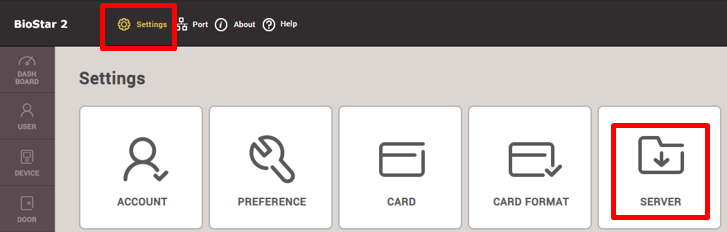
1.3 Pre-Configuration
To use Visitor Menu, one of the below options should be enabled in advance.
- Option1)
Settings>Server>User/Device Management> Automatic User Synchronization (All Devices or All Devices(Including user update from device))

- Option 2)
Setting>Server>Server Matching>Use Server Matching (Required License - BioStar2 AC Advanced License)
1.4 Limitations of Visitor of BioStar 2
- Access On Card is not supported.
- Not supported devices are FaceStation 2, FaceLite, and DE620(USB Card Reader). Face Recognition doesn't support for Visitor Management of BioStar2.
2. How To Configure Visitor Management
2.1 Go to Settings>Server>License to active Visitor License
2.2 Active Online license of Visitor or Offline license of Visitor

2.3 Go to Settings>Visitor
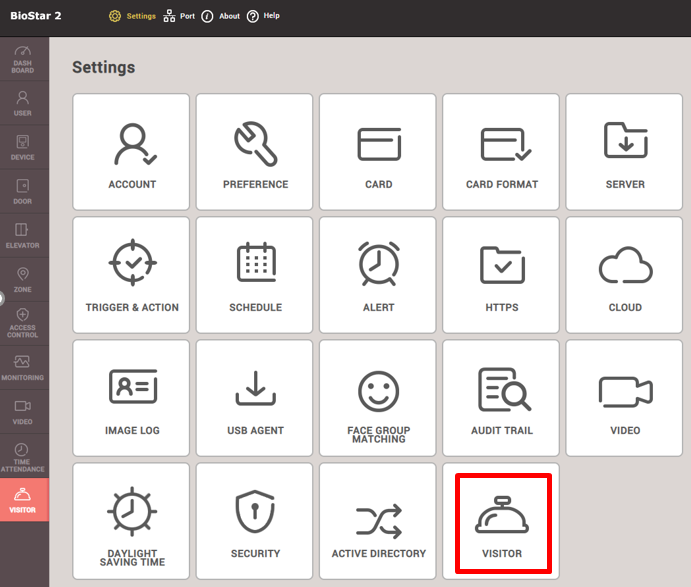
2.4 In VISTOR Menu of Settings, set [Site Setting], [Visit PC Settings], and [Visit PC Selec].
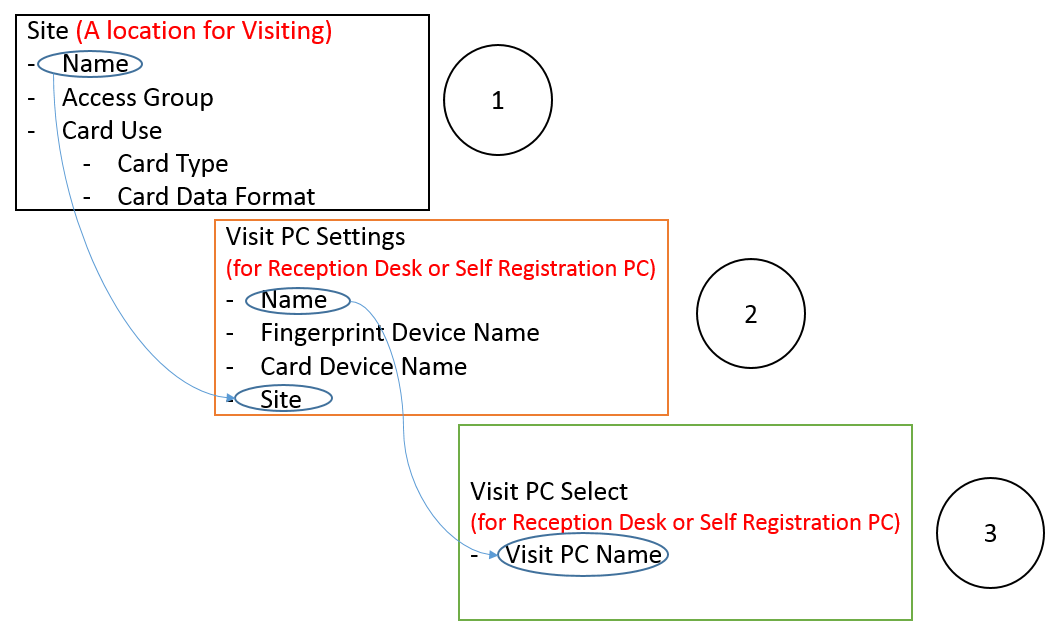
2.4.1 Go to Site Settings in Visitor to define a location(=site). The site means that a location for using visitor management.
- Click [Add] and update Name, Access Group, etc. To save the configuration, click [Apply].

▪ Name: You can set the name of site.
▪ Access Group: You can select the access group to assign to the visitor.
▪ Card Use: You can set whether or not to use a card.
▪ Card Type: You can select the type of card to use in the site. The card type is activated only when you select Card Use. (Not supported- Access On Card)
▪ Card Data Format: You can configure the format for reading card data. The Card Data Format is activated only when you set the Card Type to Wiegand.
2.4.2 Configure Visit PC Setting for Reception Desk and Self Registration.

▪ Name: You can enter the name of the self-registration PC or the reception PC.
▪ Fingerprint Device Name: Select a device to enroll visitors' fingerprints when visitors access the site using the fingerprint authentication.
▪ Card Device Name: Select a device to issue the card to visitors when visitors access the site using the card authentication.
▪ Site: Select a site to manage the visit on the visiting PC.
2.4.3 Select the visit PC site & Click[Apply].
This configuration should be assigned per a PC.
Let's say, there are a Reception Desk and a Self-Registration PC. To complete the Visitor Menu, you should login BioStar2 SW and then, set [Visit PC Select] with selecting Visit PC Name to each PC.
(For Reception Desk)

(For Self Registration PC)
1) Refer [BioStar 2] How To Configure Self-Registration Page of Visitor Management
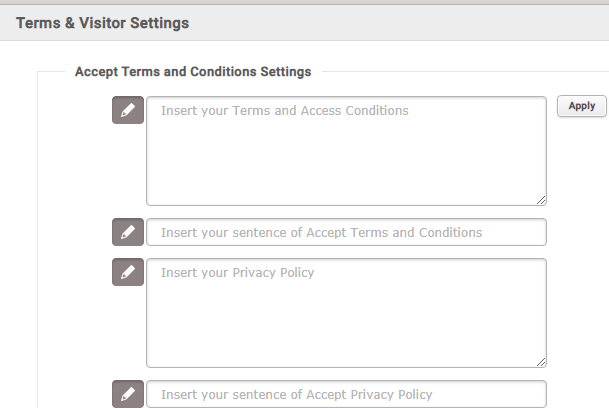
2.4.4 Configure [Terms & Visitor Settings]
To receive the visitor's information, you should have the agreement of the visitors. Define the privacy policy of your company and then, fill in each form.
Set the period for the personal information storage of the visitors to set [Personal Data Expired] status. The default days is 365. *Automatic deletion of Visitor Information is not supported. It should be managed by Administrator or Operators.

Let's say, The configuration of [Allowed period for credential] is 365 Days. The visitor information is sent to [Personal Data Period] of [Visitor] of BioStar2 365 days after. Therefore, Administrator or Operator can delete the visitor information.

2.4.5 Configure [Visitor Settings] to indicate the visitor announcement and default access period for visitor

2.4.6 Configure [Custom Visitor Field] if you would like to add additional field of the visitor information. (Up to 10)

3. How To Assign the login level of BioStar2 SW
Administrator of Biostar2 can make Visitor Operator Level of Login account in BioStar2.
Depends on the company policy, Administrator, Visitor Operator, or Custom Level of Visitor Menu can access Visitor menu.

Related Articles
EasySecure.cloud - What is Visitor Management?
Visitor management is a standard module of the EasySecure.cloud Software As a company, you only have one opportunity to make a positive and competent first impression. A visitor only feels truly welcome if he or she is expected. In addition, there a ...BioStar 2 - How to configure Secure Communication (TLS/SSL)
Concept A transport layer security (TLS/SSL) feature for the communication between the server and device has been implemented in BioStar 2.4. This feature would stop malicious users from connecting to the device by pretending to be the server with ...BioStar 2 - How to use the Leave Management function
If you want to authorize Leave to an employee/employer, you can utilize Leave Management tool. A Leave can be a various types of absence such as personal leave (vacation or time-off), family incidents (death or accidents), maternity leave (fraternity ...BioStar 2 - How to add and configure a Secure I/O2
BioStar 2 - How to delete blacklisted CSN cards
What is a Blacklist? A list of cards that are denied for authentication on the BioStar device. When a card is lost or stolen, misuse can be prevented by registering the ID of the card in the blacklist. Why would you want to delete a blacklisted CSN ...