BioStar 2 - How to backup and Restore the Maria Database in BioStar 2
BioStar 2's database has gone through a few changes since it's release.
The AC database started out with the SQLite Database and in version 2.2.1, the MariaDB T&A database was released.
Starting version 2.3, both databases became Maria DB by default (express installation). Hence the backup method has changed as well.
Refer to the image below to see the changes in the Database in BioStar 2 versions.
Automatic database backup of AC database is only supported up to version 2.2.1
License Backup
If you would like to re-use your BioStar 2 license, refer to the following article: [BioStar 2] Reactivating the License
Database Backup
Cautions:
- For BioStar 2.6, you must back up the encryption key. Refer to the backup instructions in the 2.6 database backup section below.
2.0 ~ 2.2.2 Database Backup and Restore
You can use refer to the PDF attachment to back up your BioStar 2.0~2.2.2 database.
Note that the AC database can be backed up easily with a copy and paste after stopping BioStar 2 services because it is a SQLite DB.
For the T&A database, use the option to back up with the instructions shown in 2.3~ Database Backup below.
2.3~2.5 Database Backup
Note: For MSSQL backup, refer to the following link. MS SQL Database Backup and Restore Instructions
You will have to install MySQL Workbench to back up and restore the database.
Important Note for T&A Users
If you are making a clean uninstall and reinstalling BioStar 2.3 in the server PC or if you are installing and restoring BioStar 2.3 in another PC, you will have to back up the security folder in the path below:
C:\Program Files\BioStar 2(x64)\ta\security
Copy the files in the folder and paste it the same path of your new BioStar 2.3 when restoring your T&A.
This only applies to version 2.3 T&A and this process is not required for version 2.4
Important Note for BioStar 2.5 Users
If you enable the "Secure Communication with device" option, you will have to back up the cert folder in the path below.
C:\Program Files\BioStar 2(x64)\cert
Caution: You must stop your BioStar 2 server when backing up and restoring the database.
1.Open a web browser.
2.Access the following link
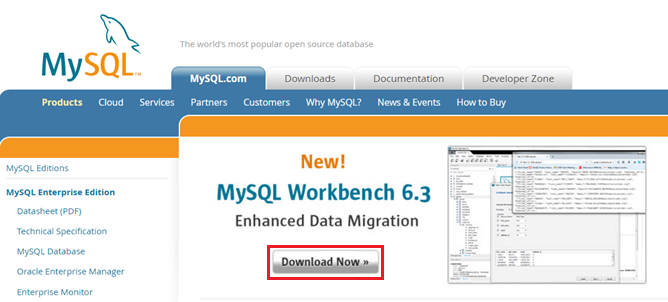
3.Click Download Now to download MySQL Workbench.
Caution: use the 6.3 version of Workbench, latest versions have issues with backup
4.Click Looking for previous GA versions then select version 6.3.10 and click download.
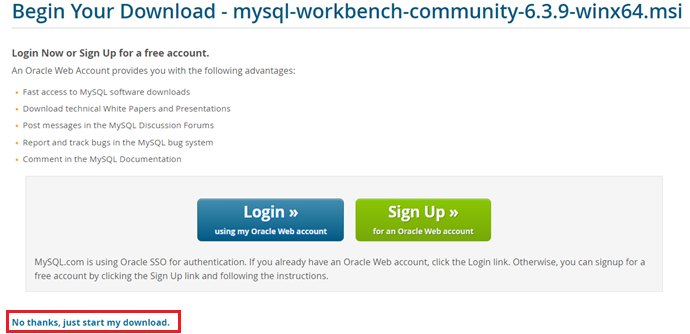
5.Click No thanks, just start my download.
6.Run the downloaded file.
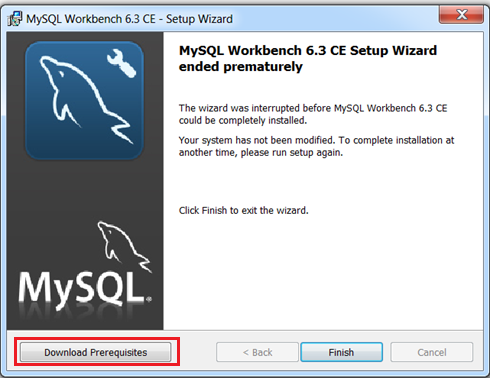
7.It will ask you to install the prerequisites. Click Download Prerequisites.
8.The link will guide you to download the files below. Install if you don’t already have them:
9.After installing all the prerequisites, run the MySQL Workbench installer again.
10.Launch MySQL Workbench with administrator privileges.
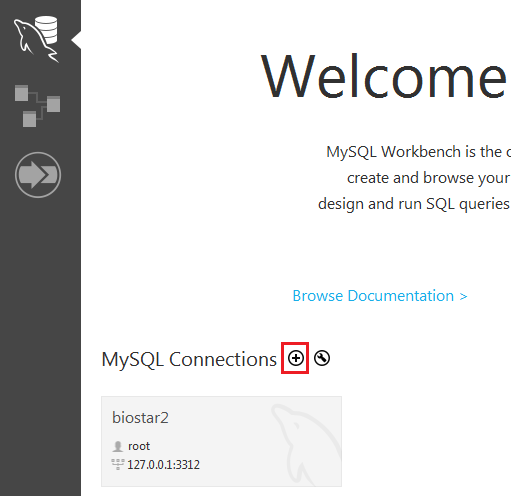
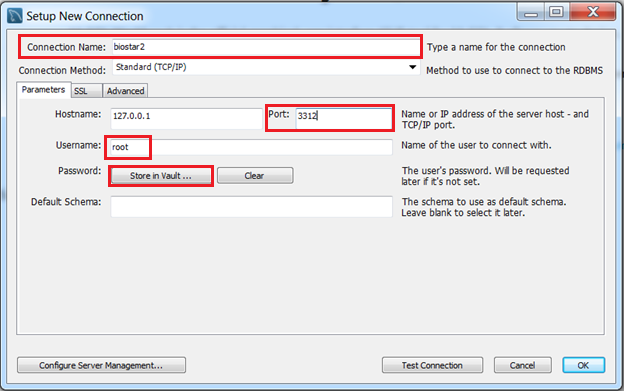
11.Click the + sign.
12.Set a name for Connection Name.
13.Set the Port to 3312.
14.Enter your database administrator id in Username.
The account you configured in the BioStar 2 express installation is root.
15.Click Store in Vault … and enter password.
16.Click Test Connection and check that it is successful.
17.If you see a Connection Warning click Continue Anyway.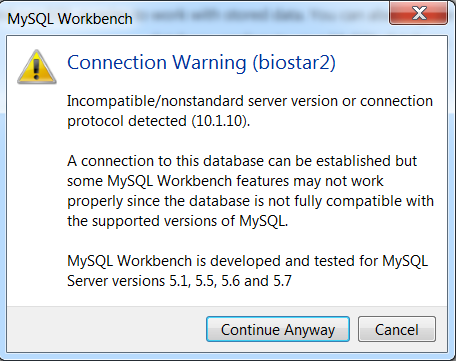
18.Click Ok to connect to the database.
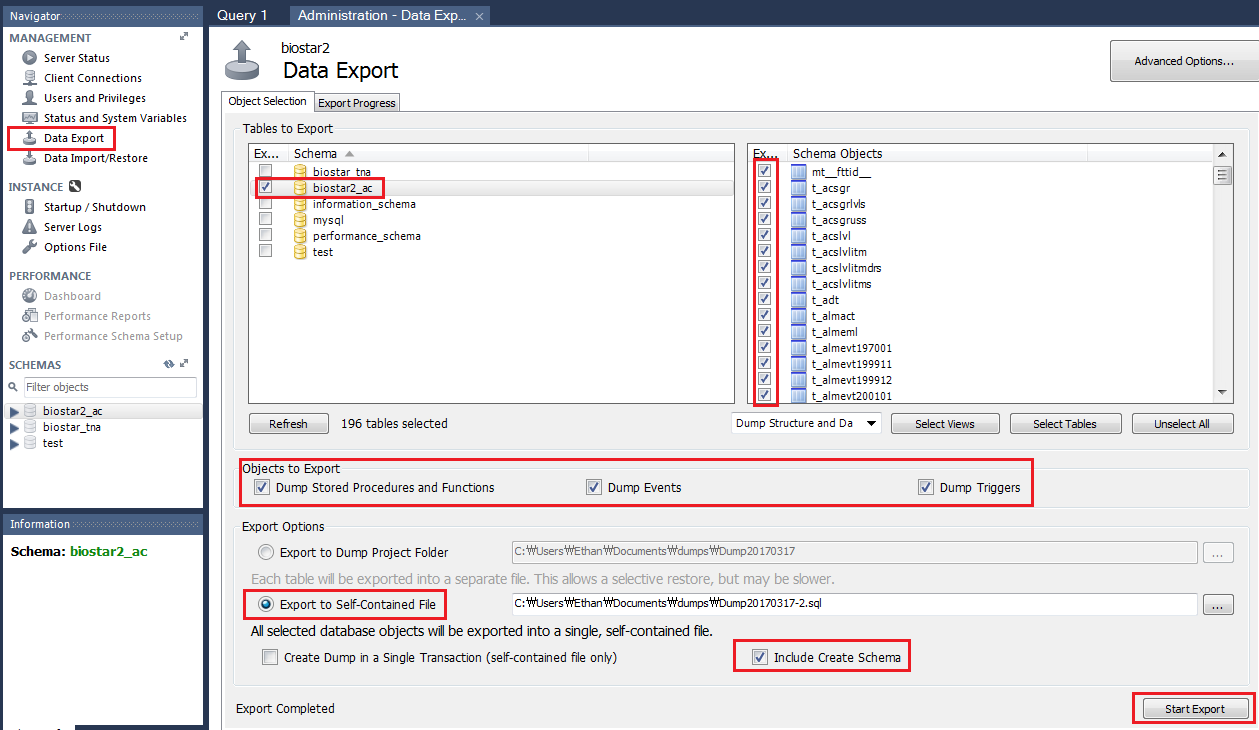
19.Select Data Export on the Navigator.
20.On Object Selection – Schema, select the database you want to back up.
* It is recommended to back up the AC and TA database separately.
* biostar2_ac is the AC database and biostar_tna is the T&A database.
* biostar_ve is the video database (version 2.5 and above)
21.On the right column Schema Objects, check that all tables are checked.
22.On Objects to Export check all three items.
23.For Export Options select Export to Self-Contained File.
24.Check Include Create Schema.
25.Click Start Export.
The process will take several minutes and longer based on the size of your database.
Note: When providing the database for troubleshooting to the tech team, exclude the Include Create Schemacheckbox.
Image Logs
If you want to back up the image log images, you will have to back up the imagelog folder in the BioStar 2 directory.
C:\Program Files\BioStar 2(x64)\

Configuration
If you are going to restore the server in a different PC, you will have to back up the configuration files which hold the cloud and server settings.
Back up the setting.conf and system.conf files in C:\Program Files\BioStar 2(x64)
2.6 ~ 2.7 Database Backup
Back up all the files mentioned above and also the encryption key file located in C:\Program Files\BioStar 2(x64)\util
Important Note
If you enable the "Secure Communication with device" option, you will have to back up the cert folder in the path below.
C:\Program Files\BioStar 2(x64)\cert
Video Database Backup
BioStar 2 video integration was introduced in BioStar 2.5.
In order to back up BioStar 2's video database you have to follow the procedure shown above in 2.3~2.5 database backup and also copy the files in the folders below:
C:\Program Files\BioStar 2(x64)\ve\records
C:\Program Files\BioStar 2(x64)\ve\db\
Graphic Map File Backup
From BioStar 2.7, you can make a Graphic Map with BioStar2 AC Advanced license.
In order to backup up BioStar2's graphic map, copy the files in the folder below.
C:\Program Files\BioStar 2(x64)\nginx\html\upload
Database Restore
Caution:
- You cannot restore a backup of a different version of BioStar because the database structure is different for every version.
If you do proceed to make such restoration, it will cause multiple issues with the server, including large amount of system logs, server crashes, device disconnections.
i.e: backup of BioStar 2.4 restored in BioStar 2.5, backup of BioStar 2.5 in BioStar 2.4 > all not supported
- When restoring the T&A database, you have to restore the T&A database that was backed up in the same time as the AC database. If the AC and TA databases are backed up and restored in different time periods, it will cause issues with the server.
2.3~2.5 Database Restore
1. Install MySQL Work Bench and Connect to the database as shown above in the back up process.
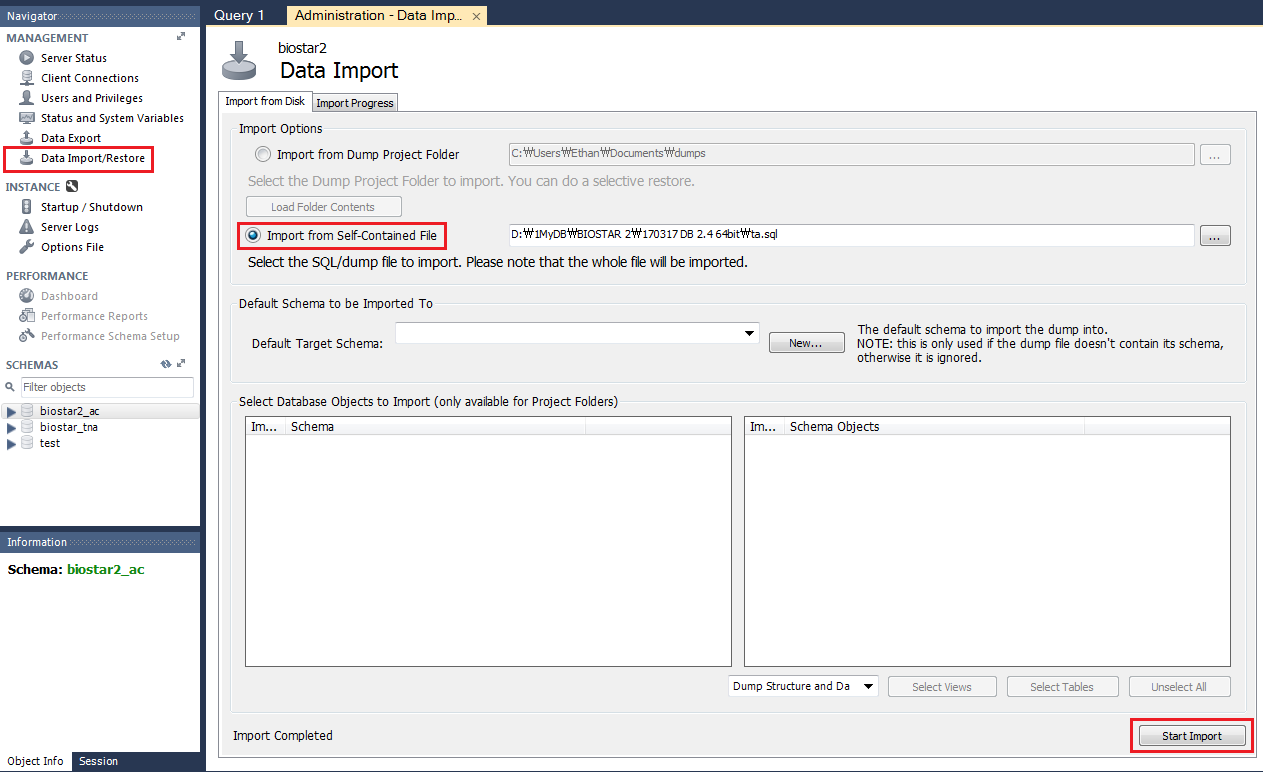
2. Select Data Import/Restore.
3. Click Import from Self-Contained File radio button.
4. Select your file to import by pressing the … button.
5. Click Start Import.
Note
When you restore the T&A database, you have to stop and start all BioStar 2 services again with BioStar Setting.
Important Note
Restore the files in the path below if you are using the "Secure Communication with device" option.
C:\Program Files\BioStar 2(x64)\cert
Configuration
If you are restoring your server in a new PC and not a existing BioStar 2 install, restore the server configuration as below.
Open the setting.conf and system.conf files you backed up from C:\Program Files\BioStar 2(x64)
Paste the relevant configuration contents to the setting.conf and system.conf files in C:\Program Files\BioStar 2(x64)
Caution: Note that the items port (https server port) and ssl_address (server IP) in the setting.conf should be configured according to the new server's IP and BioStar Setting configuration.
2.6 ~ 2.7 Database Restore
Restore your database based on 2.3~2.5 database restore instruction and additionally restore the encryption key file located in C:\Program Files\BioStar 2(x64)\util
This must be placed in the directory before starting the services.
Important Note
Restore the files in the path below if you are using the "Secure Communication with device" option.
C:\Program Files\BioStar 2(x64)\cert
Video Database Restore
In addition to restoring the database, restore the following folders that you have backed up
C:\Program Files\BioStar 2(x64)\ve\records
C:\Program Files\BioStar 2(x64)\ve\db\
Image Logs
If you want to restore the image log images, you will have to paste the imagelog folder you backed up before in the BioStar 2 directory.
C:\Program Files\BioStar 2(x64)\
Note: The image logs that are stored in this folder are the image logs that you have clicked to check in the monitoring menu. Not all logs are saved in this folder by design to help with BioStar 2 performance
Graphic Map File Backup
If you want to restore the applied files of Graphic map, you will have to paste the upload folder you backed up before in the BioStar 2 directory.
C:\Program Files\BioStar 2(x64)\nginx\html\upload
Related Articles
BioStar 2 - How to backup and Restore the Database in BioStar 2
BioStar 2's database has gone through a few changes since it's release. The AC database started out with the SQLite Database and in version 2.2.1, the MariaDB T&A database was released. Starting version 2.3, both databases became Maria DB by ...BioStar 2 - How to update to a newer version
BioStar 2 supports direct upgrade from the 2.5v to the latest version. If your BioStar 2 version is 2.5v or higher, you can just download the latest version and conduct an upgrade. However, you cannot upgrade from a very old version such as 2.0 to ...BioStar 2 - Maria DB Access and Account Configuration
Default Security Measures Introduced in BioStar 2.4.1 (2017 Q2) External access to Maria DB is blocked by default [root account only has localhost / 127.0.0.1 connection privilege] This means you can only configure the Host as 127.0.0.1 or localhost ...BioStar 2 - Hoe backup en restore ik de database?
V2.3 en Hoger - Database Back-up U zult MySQL Workbench moeten installeren om te database te back-uppen en terug te plaatsen. Belangrijk bericht voor T&A gebruikers! Als u een schone installatie of herinstallatie uitvoert van BioStar 2.3 op de ...BioStar 2 - How to use the DB Migration Tool
This document will guide you through the process of how to use the DB migration tool. This DB migration Tool will be helpful to convert user information of BioStar 1.x to user information of Biostar 2.x. Please read the manual carefully and follow ...


